beginners intro to materials in 3ds Max when your first starting out using max, the material editor can seem rather big and complicated, but its really easy once you get the hang of it lets take a look at the material editor
seems pretty complicated but its not, lets start off by looking at the toolbar and the more used buttons.
half of those you wont really use a whole lot, at least I dont, so i'll just go over the main ones.
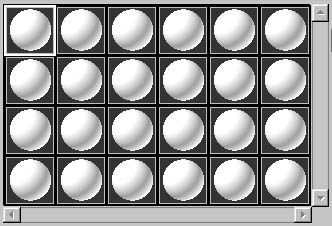
each of the 24 spheres in this represent 1 material, with the use of multi subobject materials you should never have to worry about running out of materials for your scene.
the next part you'll want to know about is the basic blinn parameters rollout. its not really too complicated and better for setting up flat color materials that you might use while modeling something, like the one above is.
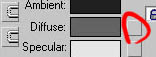
the 2 bracket looking icons on the left allow you to lock any two of ambient/specular/diffuse together to use only one color, ambient and diffuse default to being locked, but when modeling i prefer to have a darker ambient and lighter diffuse with a white specular to really bring out the form of the mesh. the blank squares on the right are an easy way to load a map to control each lighting type, there would be a 3rd by ambient, but its locked, and pretty much useless for game models anyway.
opacity basically will make anything your material is applied to transparent based on the number from 0-100 once again, the blank square buttons on the right allow you to load in an image file to control these parameters as well.
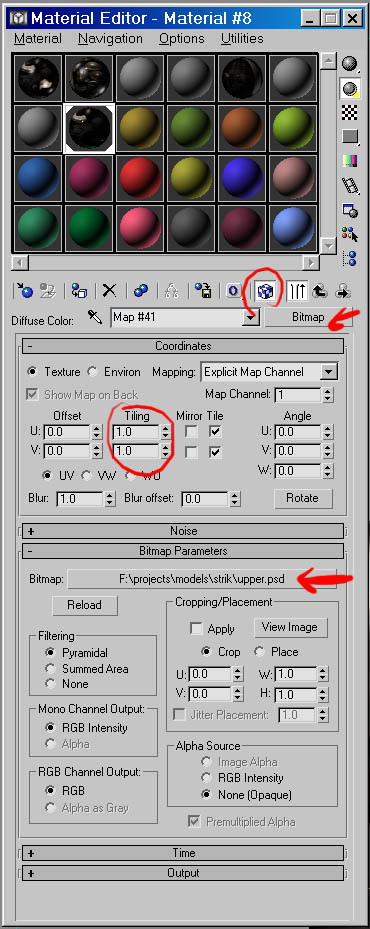
this is the specular control. specular highlights are a way of setting how shiny something basically is. specular level controls how much specular you use. glossiness controls how sharp those high lights are (matte or pinpoint). soften is a way to adjust the softness of the specular too, i find i can get by with just adjusting the specular level and glossiness. Next up i'll go over setting up an image texture for a mesh in max. there are 2 ways to do this
you can expand out the maps tab
and click the diffuse slot OR
you can click the empty square icon next to the diffuse color.
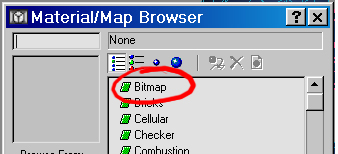
once you've done that you'll want to click bitmap in the next window that opens up
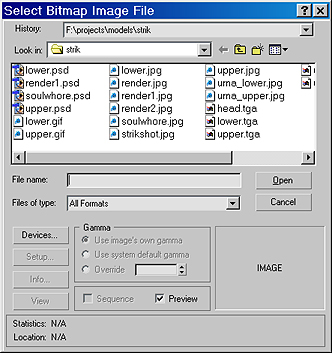
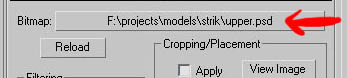
you'll then want to find the image file you want to use.
in this new window you can adjust things like tiling and change some settings so you can setup an alpha channel visable in the viewports
clicking bitmap at the top right allows you to change this material to something other than an image if you like.
you can relect your file if you pickec the wrong image by clicking the files name. In max 5 any image automatically reloads if its been modified but if for some reason it doesn't, hitting reload will work just as well.
thats really all you need to know to get a basic material setup for use with any game characer, but as always its a good idea to play around with the other options to see what they do too. |


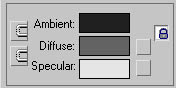 this baxically
sets the colors of each of the lighting types (ambient,diffuse,specular)
for the material. its a good idea to play around with these settings
to get a feel for how they work.
this baxically
sets the colors of each of the lighting types (ambient,diffuse,specular)
for the material. its a good idea to play around with these settings
to get a feel for how they work.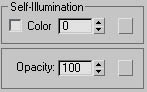 self illumination
is basically what it sounds like, when checked, and at 100 this material
will never recieve lighting information from other lights in max. Some
people use this setting while textuting to see the texture doing 100%
of any shading on a model. i prefer to use the ambient light settings
to accomplish this same effect.
self illumination
is basically what it sounds like, when checked, and at 100 this material
will never recieve lighting information from other lights in max. Some
people use this setting while textuting to see the texture doing 100%
of any shading on a model. i prefer to use the ambient light settings
to accomplish this same effect.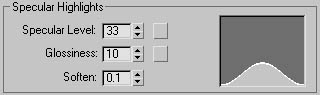


